Cisco ASA: Site-to-Site VPN Configuration Example

With this article I want to show some basic configuration example on how to establish a site-to-site VPN using Cisco ASAs. Even though it is more comfortable to configure this kind of stuff using the ASDM GUI, i thought it was a pretty good exercise to try to setup everything on the console.

Goal

  • Monitoring asaSiteA via SNMP and ICMP Ping from hosts hostSiteB-SNMP and hostSiteB-Ping
  • Sending asaSiteA Syslogs to hostSiteB-Syslog
  • Relaying DNS queries sent to asaSiteA to hostSiteB-DNS
  • Allow access to a webservice hosted on hostSiteB-WWW from netSiteA
  • All traffic between netSiteA and netSiteB has to be tunneled

Network Diagram


 +-----------------------+          +---------------------------------+
 | netSiteA              |          | netSiteB                        |
 |-----------------------|          |---------------------------------|
 |             +--------+|          |+--------+     +----------------+|
 |             |asaSiteA|<---------->|asaSiteB+--+--+hostSiteB-SNMP  ||
 |             +--------+|          |+--------+  |  +----------------+|
 +-----------------------+          |            |--+hostSiteB-WWW   ||
                                    |            |  +----------------+|
 +---------------------------+      |            |--+hostSiteB-Syslog||
 | Network Entities          |      |            |  +----------------+|
 |---------------------------|      |            |--+hostSiteB-DNS   ||
 |netSiteA: 10.0.1.0/24      |      |            |  +----------------+|
 |netSiteB: 10.0.2.0/24      |      |            +--+hostSiteB-Ping  ||
 |                           |      |               +----------------+|
 |asaSiteA-int:  10.0.1.1    |      +---------------------------------+
 |asaSiteA-ext: 10.0.10.1    |
 |                           |
 |asaSiteB-int:  10.0.2.1    |
 |asaSiteB-ext: 10.0.20.1    |
 |                           |
 |hostSiteB-Syslog: 10.0.2.10|
 |hostSiteB-SNMP:   10.0.2.11|
 |hostSiteB-Ping:   10.0.2.12|
 |hostSiteB-DNS:    10.0.2.13|
 |hostSiteB-WWW:    10.0.2.14|
 +---------------------------+

Config of asaSiteA (only relevant parts)


! Object definitions
name asaSiteA-int 10.0.1.1
name asaSiteA-ext 10.0.10.1
name asaSiteB-ext 10.0.20.1

object network netSiteA
 subnet 10.0.1.0 255.255.255.0

object network netSiteB
 subnet 10.0.2.0 255.255.255.0

object network hostSiteB-Syslog
 host 10.0.2.10

object network hostSiteB-SNMP
 host 10.0.2.11

object network hostSiteB-Ping
 host 10.0.2.12

object network hostSiteB-DNS
 host 10.0.2.13

object network hostSiteB-WWW
 host 10.0.2.14

object service dns
 service udp destination eq domain
 description dns

! Interface settings
interface Ethernet0/0
 nameif int
 security-level 100
 ip address asaSiteA-int 255.255.255.0

interface Ethernet0/1
 nameif ext
 security-level 0
 ip address asaSiteA-ext 255.255.255.0

! Traffic that gets encrypted and sent through VPN
access-list acl_crypt remark Crypt_IP_netSiteA_to_netSiteB
access-list acl_crypt extended permit ip object netSiteA object netSiteB

! ACE for interface "ext"
access-list acl_ext_in remark Allow_ICMP_hostSiteB-Ping_to_netSiteA
access-list acl_ext_in extended permit icmp object hostSiteB-Ping object netSiteA log
access-list acl_ext_in remark Allow_SNMP_hostSiteB-SNMP_to_netSiteA
access-list acl_ext_in extended permit udp object hostSiteB-SNMP object netSiteA eq snmp log
access-list acl_ext_in remark Default_Deny
access-list acl_ext_in extended deny ip any any log

! ACE for interface "int" -> allow all outbound IP traffic to netSiteB
access-list acl_int_in remark Allow_IP_netSiteA_to_netSiteB
access-list acl_int_in extended permit ip object netSiteA object netSiteB log
access-list acl_int_in remark Default_Deny
access-list acl_int_in extended deny ip any any log

! Mapping ACEs to interfaces
access-group acl_ext_in in interface ext
access-group acl_int_in in interface int

! Setting up VPN parameters
crypto ipsec ikev1 transform-set ESP-AES-256-SHA esp-aes-256 esp-sha-hmac
crypto map ext_map 100 match address acl_crypt
crypto map ext_map 100 set pfs group5
crypto map ext_map 100 set peer asaSiteB-ext
crypto map ext_map 100 set ikev1 transform-set ESP-AES-256-SHA
crypto map ext_map interface ext
crypto ikev1 enable ext
crypto ikev1 policy 20
 authentication pre-share
 encryption aes-256
 hash sha
 group 5
 lifetime 86400

! Setting up VPN tunnels
tunnel-group asaSiteB-ext type ipsec-l2l
tunnel-group asaSiteB-ext general-attributes
 default-group-policy Policy_L2L
tunnel-group asaSiteB-ext ipsec-attributes
 ikev1 pre-shared-key 1234

! Allow management access (i.e. SNMP) from interface int
management-access int

! Enable syslog logging to SiteB
logging enable
logging timestamp
logging buffered informational
logging trap informational
logging asdm notifications
logging host int hostSiteB-Syslog
logging permit-hostdown

! Enable SNMP
snmp-server group authPriv v3 priv
snmp-server user snmpuser authPriv v3 encrypted auth md5 xxx priv des xxx
snmp-server host inside hostSiteB-SNMP poll version 3 snmpuser

! Relay/NAT DNS queries against asaSiteA to hostSiteB-DNS
nat (int,ext) source static any any destination static interface hostSiteB-DNS service dns dns

Config of asaSiteB (only relevant parts)


! Object definitions
name asaSiteB-int 10.0.2.1
name asaSiteB-ext 10.0.20.1

object network netSiteA
 subnet 10.0.1.0 255.255.255.0

object network netSiteB
 subnet 10.0.2.0 255.255.255.0

object network hostSiteB-Syslog
 host 10.0.2.10

object network hostSiteB-SNMP
 host 10.0.2.11

object network hostSiteB-Ping
 host 10.0.2.12

object network hostSiteB-DNS
 host 10.0.2.13

object network hostSiteB-WWW
 host 10.0.2.14

! Interface settings
interface Ethernet0/0
 nameif int
 security-level 100
 ip address asaSiteB-int 255.255.255.0

interface Ethernet0/1
 nameif ext
 security-level 0
 ip address asaSiteB-ext 255.255.255.0

! Traffic that gets encrypted and sent through VPN
access-list acl_crypt remark Crypt_IP_netSiteB_to_netSiteA
access-list acl_crypt extended permit ip object netSiteB object netSiteA

! ACE for interface "ext"
access-list acl_ext_in remark Allow_Syslog_asaSiteA-int_to_hostSiteB-Syslog
access-list acl_ext_in extended permit udp object asaSiteA-int object hostSiteB-Syslog eq syslog log
access-list acl_ext_in remark Allow_SNMP_asaSiteA-int_to_hostSiteB-Syslog
access-list acl_ext_in extended permit udp object asaSiteA-int object hostSiteB-SNMP eq snmp log
access-list acl_ext_in remark Allow_DNS_netSiteA_to_hostSiteB-DNS
access-list acl_ext_in extended permit udp object netSiteA object hostSiteB-DNS eq dns log
access-list acl_ext_in remark Allow_WWW_netSiteA_to_hostSiteB-WWW
access-list acl_ext_in extended permit tcp object netSiteA object hostSiteB-WWW eq www log
access-list acl_ext_in remark Default_Deny
access-list acl_ext_in extended deny ip any any log

! ACE for interface "int" -> allow all outbound IP traffic to netSiteA
access-list acl_int_in remark Allow_IP_netSiteB_to_netSiteA
access-list acl_int_in extended permit ip object netSiteB object netSiteA log
access-list acl_int_in remark Default_Deny
access-list acl_int_in extended deny ip any any log

! Mapping ACEs to interfaces
access-group acl_ext_in in interface ext
access-group acl_int_in in interface int

! Setting up VPN parameters
crypto ipsec ikev1 transform-set ESP-AES-256-SHA esp-aes-256 esp-sha-hmac
crypto map ext_map 100 match address acl_crypt
crypto map ext_map 100 set pfs group5
crypto map ext_map 100 set peer asaSiteA-ext
crypto map ext_map 100 set ikev1 transform-set ESP-AES-256-SHA
crypto map ext_map interface ext
crypto ikev1 enable ext
crypto ikev1 policy 20
 authentication pre-share
 encryption aes-256
 hash sha
 group 5
 lifetime 86400

! Setting up VPN tunnels
tunnel-group asaSiteA-ext type ipsec-l2l
tunnel-group asaSiteA-ext general-attributes
 default-group-policy Policy_L2L
tunnel-group asaSiteA-ext ipsec-attributes
 ikev1 pre-shared-key 1234

! Allow management access (i.e. SNMP) from interface int
management-access int

! Enable syslog logging to SiteB
logging enable
logging timestamp
logging buffered informational
logging trap informational
logging asdm notifications
logging host int hostSiteB-Syslog
logging permit-hostdown

! Enable SNMP
snmp-server group authPriv v3 priv
snmp-server user snmpuser authPriv v3 encrypted auth md5 xxx priv des xxx
snmp-server host inside hostSiteB-SNMP poll version 3 snmpuser

Remarks
Unfortunately, I could not test this setup 1:1 but it was derived from an actually running configuration I recently had to setup. If you think, something seems wrong, please drop me a comment.

Further Reference
Cisco ASA Config Guide
asciiflow – an online tool to draw ASCII network plans

Deploying the pfSense firewall system on ALIX hardware

Recently, while fiddling around with my home network I got really tired of my old Netgear Wifi router and its limited functionality. After I found out that the revision I have doesn’t allow to run any custom firmware (dd-wrt or tomato), I decided to look out for something more open (and fun). I already used IPCop and so I started from there, thinking about building up a small computer to run IPCop. But having to dedicate a computer only for use as a home router/firewall sucks a bit… So after some further web research i bumped into the ALIX boards. Basically, they’re fully featured PCs on a single board allowing to hook up a CF card and to run a OS from there. Many people are successfully running the open source FreeBSD based firewall distro pfSense (an offspring of the m0n0wall firewall distro, which btw. also runs on ALIX systems) on it, so I decided to give it a shot. I placed an order for the required hardware on www.pcengines.ch (see “My system”) and after two days everything arrived. Building the system was good fun and after 15 minutes, everything was up and running.

My system

  • 1x ALIX.2D2 system board
  • 1x Enclosure 2 LAN, black, USB
  • 1x AC adapter 18V
  • 2x Cable I-PEX -> reverse SMA
  • 2x Antenna reverse SMA
  • 1x Compex WLM54SAG23 miniPCI card
  • 1x SanDisk ULTRA Compact Flash 4 GB

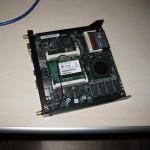
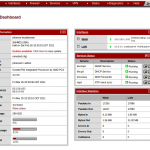
Here you can see some building steps and a screenshot of the pfSense dashboard.

Before you install anything, make sure your board has a up-to date BIOS installed. To do so, connect the ALIX to your computer using a nullmodem cable (with Serial to USB if needed). I used minocom on my ubuntu machine, using the settings 38400 8N1, without flow control. The most current BIOS as I’m writing this article is 0.99h. If you have an older version installed, you should upgrade it (check the ALIX manual).

PC Engines ALIX.2 v0.99h                                                     
640 KB Base Memory                                                           
261120 KB Extended Memory 

Installing pfSense is quite simple. Fetch the suitable image (which fits your CF card size) and flash it

Flashing the image to the CF card
I would recommend you to use a USB CF cardreader. Make sure, the CF is not mounted and get the correct device name of it. Flash the image with the following command:


zcat pfSense-2.0-RC1-4g-i386-20110226-1633-nanobsd.img.gz | dd of=/dev/sdX bs=16k

pfSense allows to read out several parameters via SNMP

Reading the system uptime via SNMP


snmpget -c public -v 2c -O qv 10.0.0.1 HOST-RESOURCES-MIB::hrSystemUptime.0

Links
http://www.pcengines.ch
http://pfsense.org
http://m0n0.ch/wall/

ActiveDirectory – Connectivity through NAT

Even though, ActiveDirectory communication through a NATed (and port-forwarded) interface is not officially supported by MS, there is a way to do that. I stumbled upon this issue, after forgetting it for quite some time (solved it with a nasty hack in the first place – keyword: read only DNS entries)

Situation:


 [DC1]------------>[NATed interface]------------>[DC2]<--------[Clients]

  • DC1 addresses DC2 by the address of the NAT interface
  • CLIENTS address DC2 by its real address

Problem
DC2 updates its DNS record with its current IP address (real address)
DC1 can't reach DC2 through its real IP, instead it would need the address of the NAT interface.

Solution
Add the following Registry Key on DC2 to force it to add its real and his NATed IP to its Host DNS records

HKLM\SYSTEM\CurrentControlSet\Services\DNS\Parameters
Registry Value: PublishAddresses
Registry Value Type: REG_SZ
Registry Value Data: sepparated by single whitespace

The nice thing is, that the DNS server serves the address of DC2 that is suitable for the host. If the host is on the same network as DC2 it gets its real IP, if its on the other side of the NATed interface it gets the NAT interfaces address.

More infos
DNS PublishAddresses Parameter: http://technet.microsoft.com/en-us/library/cc959753.aspx
Nice Technet Article about Replication through Firewalls: http://technet.microsoft.com/en-us/library/bb727063.aspx

Monitoring a remote network interface with tcpdump and Wireshark

In this small how-to, I’ll show how to capture network traffic from a remote system to analyze it using Wireshark.

All you need is tcpdump on the remote machine, where you want to dump the network traffic off and Wireshark on the computer, you want to use to look at the packets flying around.
I use this setup for checking, whats going on on my IPcop firewall.

First, you need to prepare a named pipe on you monitoring station:


mkfifo /tmp/pipe

After this, we build up the connection to the remote system, issue the tcpdump command there and direct all outputs to the pipe:


ssh root@10.1.1.254 "tcpdump -i eth0 -s 0 -U -w - not port 22" > /tmp/pipe

Now switch to another console and start Wireshark, listening to our newly created pipe:


wireshark -k -i /tmp/pipe

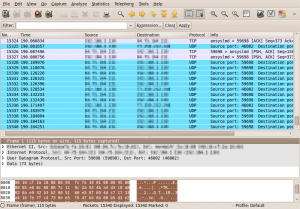
After Wireshark has started, the ssh console will ask for roots password. After you entered it, you will see the packets getting listed in Wiresharks main screen.

Used tcpdump options

  • -i eth0 specifies the interface to capture from (change to your needs)
  • -s 0 sets the packet snapshot lenght it to the default of 65535, for backwards compatibility with recent older versions of tcpdump
  • -U writes each incoming packet to the file (or std. out) immediately, instead of waiting until the buffer has filled
  • -w – writes to standard output
  • not port 22 keeps tcpdump from returning the traffic we create with our ssh connection

Further info
http://wiki.wireshark.org/CaptureSetup/Pipes
http://www.tcpdump.org/tcpdump_man.html

Adding scheduled tasks to Windows clients with GPO

In this example, I show how to add a scheduled job (taken from the article Shutting down an idle Windows computer) to multiple domain clients, using GPOs.

First, create a batch file (for example in %SystemRoot%\SYSVOL\domainname\scripts) with the following content:


schtasks /Create /RU System /TN "Shut down idle system" /SC ONIDLE /TR "C:\Windows\system32\shutdown.exe /s /f /t 0" /I 20

Open up the Group Policy Management console and add a new GPO. Go to Computer Configuration > Windows Settings > Scripts > Startup and add the newly created batch file. Now you just have to link the GPO to an OU which should be affected.

Windows XP Professional Product Documentation – Schtasks:
http://www.microsoft.com/resources/documentation/windows/xp/all/proddocs/en-us/schtasks.mspx?mfr=true

Backing up a remote fileserver with rsync over a ssh tunnel

Our scenario

We want to backup data from our remote host to our backup location.
For this, we use a combination of ssh and rsync.

This guide is held very general. Originally, I set up a secure rsync backup from a Synology NAS at a remote site to a linux server hosted in a DMZ, but it should also work for normal linux to linux box backups.

[] -----rsync over ssh------> []
remote-host                   backup-location

Setting up users and programs

  1. Make sure, you have installed rsync and ssh on both machines
  2. Create a new user on the backup-location (i.e. backupuser) and place his homedrive in /home

Creating SSH trust relationships between the two servers

To be able to schedule a backup job, and avoiding to save the ssh login password somewhere in plain text, we have to build our own small PKI

  1. Create a RSA keypair on the remote-host
    cd /home/USERNAME OR cd /root (if you work as root)
    mkdir .ssh
    cd .ssh

    ssh-keygen -t dsa -b 2048 (you can leave the passphrase empty)
  2. Export the remote-hosts public key to the backup-location
    cd /home/USERNAME OR cd /root (if you work as root)
    mkdir .ssh
    cd .ssh

    If you have previously copied the public key to a usb stick:
    cp /mnt/usb/remote_host.pub /home/USERNAME/.ssh OR /root/.ssh
  3. Tell the backup-locations ssh server that certificate login requests coming from the remote-host are ok
    cd /home/USERNAME/.ssh OR cd /root/.ssh (if you work as root)
    cat remote_host.pub >> authorized_keys
  4. Test the ssh connection from the remote-host to the backup-location
    ssh “backup-location”
  5. Make sure, all keys have restrictive permissions applied to them: Only allow the owner to interact with them (chmod 700)!

Setting up the rsync server infrastructure (on backup-location)

# GLOBAL OPTIONS
log file=/var/log/rsyncd
pid file=/var/run/rsyncd.pid

# MODULE OPTIONS
[backup]
	comment = public archive
	path = /home/backupuser/data
	use chroot = no
	lock file = /var/lock/rsyncd
	read only = no
	list = yes
	uid = backupuser
	ignore errors = no
	ignore nonreadable = yes
	transfer logging = yes
	log format = %t: host %h (%a) %o %f (%l bytes). Total %b bytes.
	timeout = 600
	refuse options = checksum dry-run
	dont compress = *.gz *.tgz *.zip *.z *.rpm *.deb *.iso *.bz2 *.tbz

Hint:
Make sure, the backupuser has the rights to write to the rsyncd- logifile (/var/log/rsyncd)

Testing our rsync tunnel (on remote-host)

rsync -avz -e “ssh -i /root/.ssh/remote_host.priv” /vol/folder backupuser@backup-location::backup OR
rsync -avz -e “ssh -i /home/USERNAME/.ssh/remote_host.priv” /vol/folder backupuser@backup-location::backup

Scheduling the backup job (on remote-host)

Take the command above (from the testing part), paste it into a textfile (put it where you want) and call it rsync_backup.sh (dont forget to chmod +x it afterwards):


#!/bin/sh
rsync -avz -e "ssh -i /home/USERNAME/.ssh/remote_host.priv" /vol/folder backupuser@backup-location::backup

Then, open up your crontab (usually somwhere in /etc) and add the following lines:


#minute hour    mday    month   wday    who     command
0       3       *       *       *       root    
  /PATH-TO-YOUR-SH-FILE/rsync_backup.sh 2>&1 >> /var/log/rsync_backup.log

This will start your backup job every day at 3am.

Detecting rogue WLANs with Kismet

In a corporate environment, where you have several IT- security related regulations, it is critical to know what kind of wireless networks are in range of your facilities to avoid the bypassing of corporate security infrastructure (such as proxies, firewalls…)

This is where Kismet comes into play and assists you in finding rogue wireless LANs, using the monitor mode of your WLAN card.

You can get the software here: http://www.kismetwireless.net/
Kismet is open-source and also included in several security related linux distros.

The usage is quite simple. Just press “h” while the program runs to display a list of available keyboard shortcuts.

Featues
(taken from kismetwireless.net)

  • Ethereal/Tcpdump compatible data logging
  • Airsnort compatible weak-iv packet logging
  • Network IP range detection
  • Built-in channel hopping and multicard split channel hopping
  • Hidden network SSID decloaking

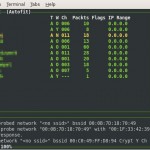
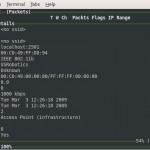
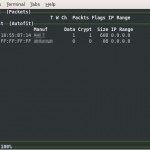
Here are some screenshots of Kismet in action

Hint (as fas as I know while using it under Ubuntu 8.10):
After closing the program, you might have to get your WLAN card back to managed mode.

  • ifconfig ethXX down
  • iwconfig ethXX mode managed
  • ifconfig ethXX up

Restoring computer-images over the network using dd

In this brief walkthrough I describe, how to restore a previously created dd– image (http://de.wikipedia.org/wiki/Dd_(Unix)) from a host (hosting the imagefile), over the network, to one or more guests.

Of course, there are many other and more economical ways of rolling out images to clients, but in some cases it might be useful to have at least another option as a fallback solution.

Step 1: Preparation of the host PC

  • Boot Knoppix with the parameter “knoppix toram” (this installs Koppix to the ram, wich allows you to remove the CD after booting)
  • After booting, open a console and kill the DHCP client with “killall pump” (to make sure the host doesn’t change ip address while imaging)
  • Note down the hosts current IP address (use “ifconfig” to find it out)
  • Start a console prompt, “su” and open /etc/samba/smb.conf with nano and add the following lines to the bottom of the file (match the line “path” to the location where the dd image resides)
    [image]
    comment = Images
    path = /media/sdb1
    browseable = yes
    guest ok = yes
    read only = yes
  • Save the changes and reload samba with the command “/etc/init.d/samba restart”
  • Testing the samba share on the host:
    open another console and “su”
    “mkdir /img”
    “smbmount //HOSTIP/image /img/ -o username=nobody” (blank password)
    If you run “ls /img” you should be able to see some useful contents (i.e. the image files)

Step 2: Cloning the image to guests

  • Boot Knoppix with the parameter “knoppix toram” (this installs Koppix to the ram, wich allows you to remove the cd after booting)
  • Start a console prompt and “su”
    “mkdir /img”
    “smbmount //HOSTIP/image /img/ -o username=nobody” (blank password)
    “cd /img”
    “dd if=IMAGENAME of=/dev/sda”

Monitoring: check if guests are still downloading

  • Open a console on the host and enter “smbstatus”