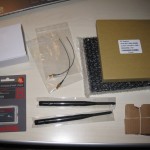
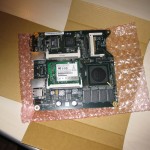
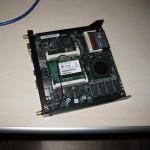
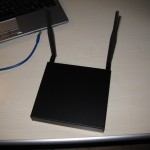
Recently, while fiddling around with my home network I got really tired of my old Netgear Wifi router and its limited functionality. After I found out that the revision I have doesn’t allow to run any custom firmware (dd-wrt or tomato), I decided to look out for something more open (and fun). I already used IPCop and so I started from there, thinking about building up a small computer to run IPCop. But having to dedicate a computer only for use as a home router/firewall sucks a bit… So after some further web research i bumped into the ALIX boards. Basically, they’re fully featured PCs on a single board allowing to hook up a CF card and to run a OS from there. Many people are successfully running the open source FreeBSD based firewall distro pfSense (an offspring of the m0n0wall firewall distro, which btw. also runs on ALIX systems) on it, so I decided to give it a shot. I placed an order for the required hardware on www.pcengines.ch (see “My system”) and after two days everything arrived. Building the system was good fun and after 15 minutes, everything was up and running.
My system
- 1x ALIX.2D2 system board
- 1x Enclosure 2 LAN, black, USB
- 1x AC adapter 18V
- 2x Cable I-PEX -> reverse SMA
- 2x Antenna reverse SMA
- 1x Compex WLM54SAG23 miniPCI card
- 1x SanDisk ULTRA Compact Flash 4 GB
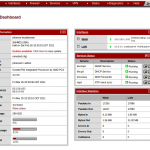
Here you can see some building steps and a screenshot of the pfSense dashboard.
Before you install anything, make sure your board has a up-to date BIOS installed. To do so, connect the ALIX to your computer using a nullmodem cable (with Serial to USB if needed). I used minocom on my ubuntu machine, using the settings 38400 8N1, without flow control. The most current BIOS as I’m writing this article is 0.99h. If you have an older version installed, you should upgrade it (check the ALIX manual).
PC Engines ALIX.2 v0.99h
640 KB Base Memory
261120 KB Extended Memory
Installing pfSense is quite simple. Fetch the suitable image (which fits your CF card size) and flash it
Flashing the image to the CF card
I would recommend you to use a USB CF cardreader. Make sure, the CF is not mounted and get the correct device name of it. Flash the image with the following command:
zcat pfSense-2.0-RC1-4g-i386-20110226-1633-nanobsd.img.gz | dd of=/dev/sdX bs=16k
pfSense allows to read out several parameters via SNMP
Reading the system uptime via SNMP
snmpget -c public -v 2c -O qv 10.0.0.1 HOST-RESOURCES-MIB::hrSystemUptime.0
Links
http://www.pcengines.ch
http://pfsense.org
http://m0n0.ch/wall/
