Relativity Pre Save Event Handler – Custom Labels

After a long pause, I finally have time to share some more stuff with you guys. This time, the topic is a different one as the other articles here. I recently worked a lot in the field of eDiscovery, particularly with a software called Relativity. The software suite is used widely for document review purposes and helps a lot in structuring and conducting reviews of unstructured data.

relativity_logo

In a recent project, I had the chance to really deep-dive into the implementation and administration of this solution. This article is about so called event handlers. If you didn’t work with Relativity yet, this might be a bit a crash start, but in general a event handler is a piece of custom code, that automatically performs actions triggered by events a Relativity user causes (e.g. an event handler might be fired, if a user clicks on the “Save” button in Relativity).

The piece of (C#) code posted here could be of interest for you, if you use pre-save event handlers to validate user input (such as field values etc.) and want to create meaningful custom error messages.
Now, when you set up your Relativity instance, you define so called “fields”, which are structures that hold any kind of data. You are free to name these fields as you like and many name them in rather technical looking ways, e.g. “revDate” as the field name for a field holding the date something was reviewed etc.
At a later stage, when you put these fields on layouts, so that users can enter data in them, you might use so called “labels” to give the field a more user friendly name, such as “Review Date”. The problem now is, that if you have an event handler that warns if the field “Review Date” is empty, the error message displayed might look like “Field revDate is empty”.
The code below allows you to use the label value in error messages, to make it easier for the user to see where the error is coming from. It’s developed for version 7.5 of Relativity, I don’t know if it works for newer ones.

First we need a read-only database account that can access the workspace tables and define the connection parameters to the database:


// Database connection credentials
public static string DbUser = "rel_evthandler";
public static string DbPassword = "rel_evthandler";
public static string DbServer = "localhost";

// Set current layout properties
documentArtifactId = Fields["Artifact ID"].Value.Value.ToString();
layoutArtifactId = this.ActiveLayout.ArtifactID;
layoutName = this.ActiveLayout.Name.ToString();

// SQL connection string
sqlConn = new SqlConnection(
    "user id=" + DbUser + ";" +
    "password=" + DbPassword + ";" +
    "server=" + DbServer + ";" +
    "database=EDDS" + this.Application.ArtifactID + ";" +
    "connection timeout=30"
);

Then we create a helper function that returns the label value for the specified ArtifactId of the field:


// Function: getFieldCustomLabel
//
// Resolves a fieldname to its corresponding custom label value
//
private static string getFieldCustomLabel(int fieldArtifactId)
{
    // SQL query to resolve custom label
    SqlCommand fieldCustomLabelCommand = new SqlCommand(
        "SELECT NameValue " +
        " FROM [EDDSDBO].[LayoutField] " +
        " WHERE [EDDSDBO].LayoutField.FieldArtifactID = @fieldArtifactId " +
        " AND [EDDSDBO].LayoutField.LayoutArtifactID = @layoutArtifactId",
        sqlConn
    );
    fieldCustomLabelCommand.Parameters.Add("@fieldArtifactId", SqlDbType.Int);
    fieldCustomLabelCommand.Parameters.Add("@layoutArtifactId", SqlDbType.Int);
    fieldCustomLabelCommand.Parameters["@fieldArtifactId"].Value = fieldArtifactId;
    fieldCustomLabelCommand.Parameters["@layoutArtifactId"].Value = layoutArtifactId;

    try
    {
        sqlConn.Open();
        string fieldCustomLabel = (string)fieldCustomLabelCommand.ExecuteScalar();
        sqlConn.Close();
        return fieldCustomLabel;
    }

    catch (Exception e)
    {
        throw e;
    }
}

Now you can use the function by passing the ArtifactId of the desired field to it:


string fieldCustomLabel = getFieldCustomLabel((int)Fields[field].ArtifactID);

Here you can find some more infos about Relativity event handlers:
https://www.kcura.com/relativity/Portals/0/Documents/7.5%20Platform%20Site/index.htm#Event Handlers/Event handlers overview.htm

Talking to the the Zabbix JSON API

Hey there, I recently tried to get some info out of my Zabbix instance to use in another context and therefore had a look at Zabbix’ API.
Turns out, it is quite simple to use and works with JSON messages.

Communication flow is pretty simple:

  1. Send username and password to the API
  2. Retrieve Auth-Token from API
  3. Send your actual query to the API and append the Auth-Token
  4. Retrieve queried data from API

To test communication, I wrote a simple PHP script to fiddle around with the possibilities of the API:


<?php

/* 
          _     _     _      
 ______ _| |__ | |__ (_)_  __
|_  / _` | '_ \| '_ \| \ \/ /
 / / (_| | |_) | |_) | |>  < 
/___\__,_|_.__/|_.__/|_/_/\_\  - API PoC

2012, looke

*/

$uri = "https://zabbix.foo.bar/api_jsonrpc.php";
$username = "testuser";
$password = "xyz";

function expand_arr($array) {	
	foreach ($array as $key => $value) {
		if (is_array($value)) {			
			echo "<i>".$key."</i>:<br>";
			expand_arr($value);
			echo "<br>\n";
		} else {			
			echo "<i>".$key."</i>: ".$value."<br>\n";
		}		
	}
}

function json_request($uri, $data) {
	$json_data = json_encode($data);	
	$c = curl_init();
	curl_setopt($c, CURLOPT_URL, $uri);
	curl_setopt($c, CURLOPT_CUSTOMREQUEST, "POST");                                                  
	curl_setopt($c, CURLOPT_RETURNTRANSFER, true); 
	curl_setopt($c, CURLOPT_POST, $json_data);
	curl_setopt($c, CURLOPT_POSTFIELDS, $json_data);
	curl_setopt($c, CURLOPT_HTTPHEADER, array(                                                                          
		'Content-Type: application/json',                                                                                
		'Content-Length: ' . strlen($json_data))                                                                       
	);
	curl_setopt($c, CURLOPT_SSL_VERIFYPEER, false);	
	$result = curl_exec($c);
	
	/* Uncomment to see some debug info
	echo "<b>JSON Request:</b><br>\n";
	echo $json_data."<br><br>\n";

	echo "<b>JSON Answer:</b><br>\n";
	echo $result."<br><br>\n";

	echo "<b>CURL Debug Info:</b><br>\n";
	$debug = curl_getinfo($c);
	echo expand_arr($debug)."<br><hr>\n";
	*/

	return json_decode($result, true);
}

function zabbix_auth($uri, $username, $password) {
	$data = array(
		'jsonrpc' => "2.0",
		'method' => "user.authenticate",
		'params' => array(
			'user' => $username,
			'password' => $password
		),
		'id' => "1"
	);	
	$response = json_request($uri, $data);	
	return $response['result'];
}

function zabbix_get_hostgroups($uri, $authtoken) {
	$data = array(
		'jsonrpc' => "2.0",
		'method' => "hostgroup.get",
		'params' => array(
			'output' => "extend",
			'sortfield' => "name"
		),
		'id' => "2",
		'auth' => $authtoken
	);	
	$response = json_request($uri, $data);	
	return $response['result'];
}

$authtoken = zabbix_auth($uri, $username, $password);
expand_arr(zabbix_get_hostgroups($uri, $authtoken));

?>

If everything worked, the scripts output should look something like this:


0:
groupid: 5
name: Discovered Hosts
internal: 1

1:
groupid: 2
name: Linux Servers
internal: 0

2:
groupid: 7
name: NAS
internal: 0

3:
groupid: 6
name: Routers
internal: 0

4:
groupid: 3
name: Windows Servers
internal: 0

5:
groupid: 4
name: Zabbix Servers
internal: 0

Important
Authentication method is user.authenticate and NOT user.login as mentioned in the manual.

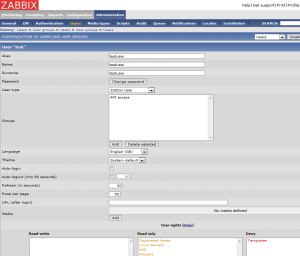
Setting up a Zabbix user with API access

Additional info
http://www.zabbix.com/documentation/1.8/api/getting_started

Adding KML Tracklogs to a Google Map

I finally got my hands on a GPS Track logger device (Holux M-241, a very nice gadget by the way) and thought to myself, it would be nice, if I could take those KML track log files and just upload them somewhere to make them available to be viewed on a web page. This is what came out as a first lazy sample:

https://looke.ch/kmloverlay/
You can find the source here: https://looke.ch/kmloverlay/source.php

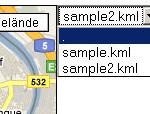
It basically looks for KML files in a folder, which you define and puts them in a select box. Here you can select the file you want to have drawn on the Map. Very basic functionality, but its a start at least. Probably I will continue to add new stuff to it (like a description of the track logs or comments etc.)

The main part of this sample is Googles GGeoXml class, which allows to pass a publicly available KML to the Google Maps API:


map = new GMap2(MapElement);
geoXml = new GGeoXml(KMLurl);
map.addOverlay(geoXml);


UPDATE:
In order to preserve the usability on mobile devices (e.g. Android phones), I added some JS to load a different style for devices with screens that are less than 320px wide:


if (screen.width <= 320) {
document.write('<style type="text/css">div#map{width: 300px; height: 310px;}</style>');
}
else {
document.write('<style type="text/css">div#map{width: 640px; height: 480px;}</style>');
}

A small webchat using JavaScript, PHP and MySQL

During my studies, I had some lectures about Ajax driven web-services in the second or third semester and I thought, that I can build something like that on my own. So I started this little chat project and gave it a try.

Used technologies:
JavaScript (for Ajax action), PHP and MySQL, HTML and CSS
(Thats also where the name comes from – AMPChat – AjaxMysqlPhpChat)

The working mechanism is the following (simplified):
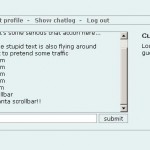
A JavaScript function polls a PHP script, telling it which chatmessages it already knows. The PHP script checks, whether there are new chatmessages stored in the database or not and sends its response – an XML with either no records (if no new messages are around) or one with the missing chatmessages. The JavaScript then writes the new messages in a DIV element of a website.

The chat is available under the following link:
https://looke.ch/amp
user: guest
password: 123123

The whole thing is open-source. You can find the code here: https://looke.ch/amp/source.php

Recursively delete outdated files with VBScript

Recently, I came across the situation, where I had to delete outdated SQL backup files from our MS SQL servers Backup directory. To tidy up the backup folder, I wrote a small VB script which handles this for me:


' DeleteOutdated
'
' Parameters
' MaxFileAge: Maximum file age in days (modification date)
' Path: Folder which contains the files
'
' VBScript ref. http://msdn.microsoft.com/en-us/library/t0aew7h6(VS.85).aspx
' FSO ref. http://msdn.microsoft.com/en-us/library/z9ty6h50(VS.85).aspx

Dim objFso
Set objFso = CreateObject("Scripting.FileSystemObject")

Sub DeleteOutdated(Path, MaxFileAge)
	Set objDir = objFso.GetFolder(Path)
	For Each objFile in objDir.Files
		If objFile.DateLastModified < (Date() - MaxFileAge) Then
			AskDelete = MsgBox("Delete "&objFile.Path&"?",3,"Delete file")
			If AskDelete = 6 Then
				objFile.Delete
			End If
			If AskDelete = 2 Then
				WScript.Quit
			End If
		End If
	Next

	For Each objSubfolder in objDir.Subfolders
		Call DeleteOutdated(objSubfolder, MaxFileAge)
	Next
End Sub

Call DeleteOutdated("c:\outdatedstuff", 1)

Hint
In this state, the script asks to delete everytime, if it finds a file wich is older than specified. Of course, you might want to remove that in productive usage, when script execution is scheduled.

Extended
Here I attached a version, which writes a logfile and processes empty subfolders (updated on 26.08.2009):
deleteoutdated-wlog

A simple How-To to csv handling with PHP

This How-To provides a quick overview on how to add simple csv import-export functionality to your PHP project.

Write a csv from an array


$data = array('Text1', 'Text2', 'Text3'); // start with your data array
$delimiter = ",";			  // set delimiting character
$file = "./target.csv";			  // specify the target file
$line[0] = implode($delimiter, $data);	  // set content of the first line
$fileprocess = fopen($file, "w");	  // open the target file in write mode
fwrite($fileprocess, $line[0]."\n");	  // write the first line to the file
fclose($fileprocess);			  // close the target file

Read a csv to an array


$delimiter = ",";			  // set delimiting character
$file = "./source.csv";			  // specify the source file
$line = file($file);			  // read file line by line
$data = explode($delimiter, $line[0]);	  // get contents by line
	  	  	  	  	  // (0 for line 1, 1 for line 2 and so on...)
// access the data
$data[0];
$data[1];
$data[2];

The structure of source.csv/target.csv


Text1,Text2,Text3

The scripts above are just to demonstrate the basic functionality. There are many possibilities to extend them (i.e. add a way to write more than one line by working with a “for” expression and so on…)

Displaying custom markers with Google Maps

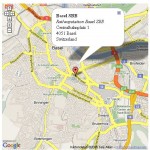
In this example, I try to explain you how to embed custom markers, containing data from an external datasource (in this case a MySQL database) in a Google Maps map, like the example below:

To test my code yourself, you need the following:

  • A Google Maps API key (get one here)
  • A Webserver capable of running PHP and MySQL (for development I recommend XAMPP)
  • Little knowledge of PHP and JavaScript

Lets call the project MapSomeStuff.
The whole thing consists of two files, a JavaScript file, wich contains the most of the calls to the Google Maps API and a PHP file, containing my MapSomeStuff class wich gets data from the database and prepares it to be put on the map.

Technical backgrounds

In a first step, we take the address of our marker- entry and pass it over to the Google Maps API to translate it to latitudinal and longitudinal (lat and lng) coordinates (wich is essential in the next step).

Now the data, wich is later displayed on the map as a marker is being read from the database and formated as XML- output (look out for the lat and lng attributes):

<markers>
<marker name="Basel SBB" street="Centralbahnplatz" nr="1" town="Basel"
 zip="4051" country="Switzerland" description="Railwaystation Basel SBB"
 lat="47.5482662" lng="7.5909349"/>
</markers>

In my example we still have the address in the XML dataset. This is only additional information for the user. In fact, Google Maps only needs the lat and lng attributes to place the marker on the map.

The XML gets sent to the Google Maps API, wich then places the markers on the correct coordinates.

The code

To avoid ruining the site’s look, I link the code. Just downlad the file, rename accordingly and put them all in the same directory:
mapsomestuffphp – containing the PHP class and HTML parts. Rename to mapsomestuff.php
mapsomestuffjs – containing the API calls. Rename to mapsomestuff.js
mapsomestuffsql – containing the database structure and an initial dataset

Dynamically add HTML- elements using Javascript

Ever wanted to dynamically add HTML- form elements to your website? For example, if you want to have the ability to assemble your own list of items?

This script might help you to do so. It is extensible to add other elements as just normal input- fields.

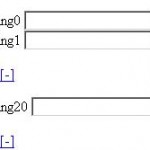
After integrating it to your site, the whole thing might look like this:

You can add new input fields with the [+] button and remove existing inputs with [-]

Currently running flawlessly with Mozilla Firefox. Internet Explorer causes problems.


<html>
<head>
<title>JS HTML Element adder (w. OOP)</title>
<script language='JavaScript' type='text/javascript'>

function FormInput(name) {
	this.name = name;
	// window[name] = this;
	this.FormInput = new Array(0);
	this.FormInputValue = new Array(0);

	document.write("<p id='" + this.name + "'></p>")
	document.write("<a href='javascript:" + this.name + ".addFormInput()'>[+]
		</a>&nbsp;<a href='javascript:" + this.name + ".removeFormInput()'>
		[-]</a>");

	this.addFormInput=function() {
		this.FormInput.push(this.FormInput.length);
		this.FormInputValue.push("");
		this.createFormInput();
	}

	this.createFormInput=function() {
		document.getElementById(this.name).innerHTML="";
		for (i=0; i<this.FormInput.length; i++) {
			document.getElementById(this.name).innerHTML+=
			this.displayFormInput(this.FormInput[i],
			this.FormInputValue[i]);
		}
	}

	this.saveFormInputValue=function(id, value) {
		this.FormInputValue[id]=value;
	}

	this.displayFormInput=function(id, value) {
		return this.name + id + "&nbsp;
		<input type='text' " + this.name + "='" + id + "'
		onchange='javascript:" + this.name + ".saveFormInputValue(
		" + id + ", this.value)' value='" + value + "'><br>";
	}

	this.removeFormInput=function() {
		if (this.FormInput.length > 0) {
			this.FormInput.pop();
			this.FormInputValue.pop();
		}
		this.createFormInput();
	}
}

</script>
</head>
<body>
<form name="test">
<script language='JavaScript' type='text/javascript'>

testing = new FormInput('testing');
testing2 = new FormInput('testing2');

</script>
</form>
</body>
</html>

Sending free SMS over the SWITCH Mailgateway

One of the nice aspects of working in a universitary environment is, that you can take advance of many nice little things. For example, you can send free SMS via the Switch Mailgateway (http://www.switch.ch/mail/)

To do so, I wrote a simple PHP script, wich enables me to send SMS via a little Textbox through a Website. I used the PEAR Framework to implement the mailing- function. For readability I stripped away the HTML forms and JavaScript functions, wich limited the form’s capacity to the SMS- usual 160 characters.

<?php
require_once('Mail.php');

if (isset($_POST['smsor_message'])) {
	$options = array (
		'host'      => 'smtp.unibas.ch',
		'auth'      => false,
	);
	$mailer = Mail::factory('smtp', $options);
	if (true === PEAR::isError($mailer)) {
		die ($mailer->getMessage());
	}
	$headers = array(
		'From' => 'me@unibas.ch',
		'To' => $_POST['smsor_to']."@sms.switch.ch",
	);
	$res = $mailer->send($_POST['smsor_to']."@sms.switch.ch",
				$headers,
				$_POST['smsor_message']);

	if (true === PEAR::isError($res)) {
		die ($res->getMessage());
	}
	echo "Message <br>\n<i>".$_POST['smsor_message']."</i><br>\n
		sent to <i>".$_POST['smsor_to']."</i><br>\n";
	echo "<br><hr><br>";
}
?>