Backing up a remote fileserver with rsync over a ssh tunnel

Our scenario

We want to backup data from our remote host to our backup location.
For this, we use a combination of ssh and rsync.

This guide is held very general. Originally, I set up a secure rsync backup from a Synology NAS at a remote site to a linux server hosted in a DMZ, but it should also work for normal linux to linux box backups.

[] -----rsync over ssh------> []
remote-host                   backup-location

Setting up users and programs

  1. Make sure, you have installed rsync and ssh on both machines
  2. Create a new user on the backup-location (i.e. backupuser) and place his homedrive in /home

Creating SSH trust relationships between the two servers

To be able to schedule a backup job, and avoiding to save the ssh login password somewhere in plain text, we have to build our own small PKI

  1. Create a RSA keypair on the remote-host
    cd /home/USERNAME OR cd /root (if you work as root)
    mkdir .ssh
    cd .ssh

    ssh-keygen -t dsa -b 2048 (you can leave the passphrase empty)
  2. Export the remote-hosts public key to the backup-location
    cd /home/USERNAME OR cd /root (if you work as root)
    mkdir .ssh
    cd .ssh

    If you have previously copied the public key to a usb stick:
    cp /mnt/usb/remote_host.pub /home/USERNAME/.ssh OR /root/.ssh
  3. Tell the backup-locations ssh server that certificate login requests coming from the remote-host are ok
    cd /home/USERNAME/.ssh OR cd /root/.ssh (if you work as root)
    cat remote_host.pub >> authorized_keys
  4. Test the ssh connection from the remote-host to the backup-location
    ssh “backup-location”
  5. Make sure, all keys have restrictive permissions applied to them: Only allow the owner to interact with them (chmod 700)!

Setting up the rsync server infrastructure (on backup-location)

# GLOBAL OPTIONS
log file=/var/log/rsyncd
pid file=/var/run/rsyncd.pid

# MODULE OPTIONS
[backup]
	comment = public archive
	path = /home/backupuser/data
	use chroot = no
	lock file = /var/lock/rsyncd
	read only = no
	list = yes
	uid = backupuser
	ignore errors = no
	ignore nonreadable = yes
	transfer logging = yes
	log format = %t: host %h (%a) %o %f (%l bytes). Total %b bytes.
	timeout = 600
	refuse options = checksum dry-run
	dont compress = *.gz *.tgz *.zip *.z *.rpm *.deb *.iso *.bz2 *.tbz

Hint:
Make sure, the backupuser has the rights to write to the rsyncd- logifile (/var/log/rsyncd)

Testing our rsync tunnel (on remote-host)

rsync -avz -e “ssh -i /root/.ssh/remote_host.priv” /vol/folder backupuser@backup-location::backup OR
rsync -avz -e “ssh -i /home/USERNAME/.ssh/remote_host.priv” /vol/folder backupuser@backup-location::backup

Scheduling the backup job (on remote-host)

Take the command above (from the testing part), paste it into a textfile (put it where you want) and call it rsync_backup.sh (dont forget to chmod +x it afterwards):


#!/bin/sh
rsync -avz -e "ssh -i /home/USERNAME/.ssh/remote_host.priv" /vol/folder backupuser@backup-location::backup

Then, open up your crontab (usually somwhere in /etc) and add the following lines:


#minute hour    mday    month   wday    who     command
0       3       *       *       *       root    
  /PATH-TO-YOUR-SH-FILE/rsync_backup.sh 2>&1 >> /var/log/rsync_backup.log

This will start your backup job every day at 3am.
Detecting rogue WLANs with Kismet

In a corporate environment, where you have several IT- security related regulations, it is critical to know what kind of wireless networks are in range of your facilities to avoid the bypassing of corporate security infrastructure (such as proxies, firewalls…)

This is where Kismet comes into play and assists you in finding rogue wireless LANs, using the monitor mode of your WLAN card.

You can get the software here: http://www.kismetwireless.net/
Kismet is open-source and also included in several security related linux distros.

The usage is quite simple. Just press “h” while the program runs to display a list of available keyboard shortcuts.

Featues
(taken from kismetwireless.net)

  • Ethereal/Tcpdump compatible data logging
  • Airsnort compatible weak-iv packet logging
  • Network IP range detection
  • Built-in channel hopping and multicard split channel hopping
  • Hidden network SSID decloaking

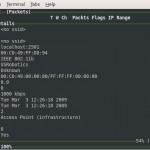
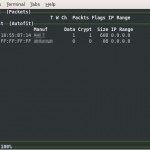
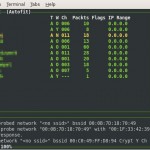
Here are some screenshots of Kismet in action

Hint (as fas as I know while using it under Ubuntu 8.10):
After closing the program, you might have to get your WLAN card back to managed mode.

  • ifconfig ethXX down
  • iwconfig ethXX mode managed
  • ifconfig ethXX up

Restoring computer-images over the network using dd

In this brief walkthrough I describe, how to restore a previously created dd– image (http://de.wikipedia.org/wiki/Dd_(Unix)) from a host (hosting the imagefile), over the network, to one or more guests.

Of course, there are many other and more economical ways of rolling out images to clients, but in some cases it might be useful to have at least another option as a fallback solution.

Step 1: Preparation of the host PC

  • Boot Knoppix with the parameter “knoppix toram” (this installs Koppix to the ram, wich allows you to remove the CD after booting)
  • After booting, open a console and kill the DHCP client with “killall pump” (to make sure the host doesn’t change ip address while imaging)
  • Note down the hosts current IP address (use “ifconfig” to find it out)
  • Start a console prompt, “su” and open /etc/samba/smb.conf with nano and add the following lines to the bottom of the file (match the line “path” to the location where the dd image resides)
    [image]
    comment = Images
    path = /media/sdb1
    browseable = yes
    guest ok = yes
    read only = yes
  • Save the changes and reload samba with the command “/etc/init.d/samba restart”
  • Testing the samba share on the host:
    open another console and “su”
    “mkdir /img”
    “smbmount //HOSTIP/image /img/ -o username=nobody” (blank password)
    If you run “ls /img” you should be able to see some useful contents (i.e. the image files)

Step 2: Cloning the image to guests

  • Boot Knoppix with the parameter “knoppix toram” (this installs Koppix to the ram, wich allows you to remove the cd after booting)
  • Start a console prompt and “su”
    “mkdir /img”
    “smbmount //HOSTIP/image /img/ -o username=nobody” (blank password)
    “cd /img”
    “dd if=IMAGENAME of=/dev/sda”

Monitoring: check if guests are still downloading

  • Open a console on the host and enter “smbstatus”