Resizing a VMware vmdk image

If you have to enlarge a VMware server vmdk- file, do the following if your VMware server runs on windows:

  1. Make sure, the VM is not running
  2. Remove or commit any snapshots of the VM
  3. Open a command prompt and cd to this path:
    C:\Program Files\VMWare\VMWare Server
  4. Run this command:
    vmware- vdiskmanager -x XGB “PATHTOIMAGE.vmdk”
    (replace XGB with the new size e.g. 30GB and PATHTOIMAGE with the path to the vmdk- file)
  5. Power up your VM and adjust the partition sizes
    (for example with the open source tool GParted)

Displaying custom markers with Google Maps

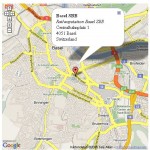
In this example, I try to explain you how to embed custom markers, containing data from an external datasource (in this case a MySQL database) in a Google Maps map, like the example below:

To test my code yourself, you need the following:

  • A Google Maps API key (get one here)
  • A Webserver capable of running PHP and MySQL (for development I recommend XAMPP)
  • Little knowledge of PHP and JavaScript

Lets call the project MapSomeStuff.
The whole thing consists of two files, a JavaScript file, wich contains the most of the calls to the Google Maps API and a PHP file, containing my MapSomeStuff class wich gets data from the database and prepares it to be put on the map.

Technical backgrounds

In a first step, we take the address of our marker- entry and pass it over to the Google Maps API to translate it to latitudinal and longitudinal (lat and lng) coordinates (wich is essential in the next step).

Now the data, wich is later displayed on the map as a marker is being read from the database and formated as XML- output (look out for the lat and lng attributes):

<markers>
<marker name="Basel SBB" street="Centralbahnplatz" nr="1" town="Basel"
 zip="4051" country="Switzerland" description="Railwaystation Basel SBB"
 lat="47.5482662" lng="7.5909349"/>
</markers>

In my example we still have the address in the XML dataset. This is only additional information for the user. In fact, Google Maps only needs the lat and lng attributes to place the marker on the map.

The XML gets sent to the Google Maps API, wich then places the markers on the correct coordinates.

The code

To avoid ruining the site’s look, I link the code. Just downlad the file, rename accordingly and put them all in the same directory:
mapsomestuffphp – containing the PHP class and HTML parts. Rename to mapsomestuff.php
mapsomestuffjs – containing the API calls. Rename to mapsomestuff.js
mapsomestuffsql – containing the database structure and an initial dataset
Uninstalling a managed Symantec AntiVirus CE client w.o. uninstall password

While dealing with managed antivirus solutions, you might want to remove outdated antivirus clients from your workstations. In the case of Symantec’s AntiVirus CE, you will be asked for an uninstall password. If you don’t know the password for any reason, do the following:
Open up regedit (Start -> Run -> regedit) and go to

HKEY_LOCAL_MACHINE\SOFTWARE\Intel\LANDesk\VirusProtect6\CurrentVersion\AdministratorOnly\Security

and set the value of UseVPUninstallPassword to “0

Now the uninstall- routine runs without asking for a password.

Dynamically add HTML- elements using Javascript

Ever wanted to dynamically add HTML- form elements to your website? For example, if you want to have the ability to assemble your own list of items?

This script might help you to do so. It is extensible to add other elements as just normal input- fields.

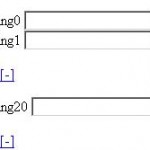
After integrating it to your site, the whole thing might look like this:

You can add new input fields with the [+] button and remove existing inputs with [-]

Currently running flawlessly with Mozilla Firefox. Internet Explorer causes problems.


<html>
<head>
<title>JS HTML Element adder (w. OOP)</title>
<script language='JavaScript' type='text/javascript'>

function FormInput(name) {
	this.name = name;
	// window[name] = this;
	this.FormInput = new Array(0);
	this.FormInputValue = new Array(0);

	document.write("<p id='" + this.name + "'></p>")
	document.write("<a href='javascript:" + this.name + ".addFormInput()'>[+]
		</a>&nbsp;<a href='javascript:" + this.name + ".removeFormInput()'>
		[-]</a>");

	this.addFormInput=function() {
		this.FormInput.push(this.FormInput.length);
		this.FormInputValue.push("");
		this.createFormInput();
	}

	this.createFormInput=function() {
		document.getElementById(this.name).innerHTML="";
		for (i=0; i<this.FormInput.length; i++) {
			document.getElementById(this.name).innerHTML+=
			this.displayFormInput(this.FormInput[i],
			this.FormInputValue[i]);
		}
	}

	this.saveFormInputValue=function(id, value) {
		this.FormInputValue[id]=value;
	}

	this.displayFormInput=function(id, value) {
		return this.name + id + "&nbsp;
		<input type='text' " + this.name + "='" + id + "'
		onchange='javascript:" + this.name + ".saveFormInputValue(
		" + id + ", this.value)' value='" + value + "'><br>";
	}

	this.removeFormInput=function() {
		if (this.FormInput.length > 0) {
			this.FormInput.pop();
			this.FormInputValue.pop();
		}
		this.createFormInput();
	}
}

</script>
</head>
<body>
<form name="test">
<script language='JavaScript' type='text/javascript'>

testing = new FormInput('testing');
testing2 = new FormInput('testing2');

</script>
</form>
</body>
</html>

Restoring computer-images over the network using dd

In this brief walkthrough I describe, how to restore a previously created dd– image (http://de.wikipedia.org/wiki/Dd_(Unix)) from a host (hosting the imagefile), over the network, to one or more guests.

Of course, there are many other and more economical ways of rolling out images to clients, but in some cases it might be useful to have at least another option as a fallback solution.

Step 1: Preparation of the host PC

  • Boot Knoppix with the parameter “knoppix toram” (this installs Koppix to the ram, wich allows you to remove the CD after booting)
  • After booting, open a console and kill the DHCP client with “killall pump” (to make sure the host doesn’t change ip address while imaging)
  • Note down the hosts current IP address (use “ifconfig” to find it out)
  • Start a console prompt, “su” and open /etc/samba/smb.conf with nano and add the following lines to the bottom of the file (match the line “path” to the location where the dd image resides)
    [image]
    comment = Images
    path = /media/sdb1
    browseable = yes
    guest ok = yes
    read only = yes
  • Save the changes and reload samba with the command “/etc/init.d/samba restart”
  • Testing the samba share on the host:
    open another console and “su”
    “mkdir /img”
    “smbmount //HOSTIP/image /img/ -o username=nobody” (blank password)
    If you run “ls /img” you should be able to see some useful contents (i.e. the image files)

Step 2: Cloning the image to guests

  • Boot Knoppix with the parameter “knoppix toram” (this installs Koppix to the ram, wich allows you to remove the cd after booting)
  • Start a console prompt and “su”
    “mkdir /img”
    “smbmount //HOSTIP/image /img/ -o username=nobody” (blank password)
    “cd /img”
    “dd if=IMAGENAME of=/dev/sda”

Monitoring: check if guests are still downloading

  • Open a console on the host and enter “smbstatus”

Mapping of network drives via batchfile

If you work in a ActiveDirectory based environment and all your clients are connected to the domain, you might not have to deal with manually map home drives and other resources.

However, if some of your clients are not connected to the domain, but need access to domain resources, you probably noticed that it can be pretty annoying having service calls because of forgotten network paths and locked accounts.

To encounter that problem, I wrote a quick and dirty script, which gives the user a basic dialogue driven netdrive-mapper, so your service desk gets rid of the most basic calls.


@ECHO OFF

ECHO Removing all available mappings...
PAUSE
NET USE * /D

:USER
ECHO Attempting to connect to SERVER and map your homedrive...
PAUSE
SET /P USER=Please enter your username (username@domain.local):
NET USE U: \\server.domain.local\%USER:~0,-13%$ /USER:%USER% /PERSISTENT:NO

ECHO Attempting to connect to SERVER and map your Groupdrives...
PAUSE

:GROUP1
SET /P GROUP1=Please enter your main Group:
NET USE V: \\server.domain.local\%GROUP1% /PERSISTENT:NO
SET /P CONTINUE=Add another Groupdrive? (y or n)

IF /I '%CONTINUE%'=='y' GOTO GROUP2
IF /I '%CONTINUE%'=='n' GOTO PUB
ECHO "%CONTINUE%" is not valid. Going to map public drives GOTO PUB

:GROUP2
SET /P GROUP2=Please enter your second Group:
NET USE W: \\server.domain.local\%GROUP2% /PERSISTENT:NO
GOTO PUB

:PUB
ECHO Attempting to connect to SERVER and map public drives...
NET USE p: \\server.domain.local\public /USER:%USER% /PERSISTENT:NO
GOTO PRINTERS

:PRINTERS
ECHO Attempting to connect to SERVER and map printers...
PAUSE
START \\server.domain.local\printer1
START \\server.domain.local\printer2

Sending free SMS over the SWITCH Mailgateway

One of the nice aspects of working in a universitary environment is, that you can take advance of many nice little things. For example, you can send free SMS via the Switch Mailgateway (http://www.switch.ch/mail/)

To do so, I wrote a simple PHP script, wich enables me to send SMS via a little Textbox through a Website. I used the PEAR Framework to implement the mailing- function. For readability I stripped away the HTML forms and JavaScript functions, wich limited the form’s capacity to the SMS- usual 160 characters.

<?php
require_once('Mail.php');

if (isset($_POST['smsor_message'])) {
	$options = array (
		'host'      => 'smtp.unibas.ch',
		'auth'      => false,
	);
	$mailer = Mail::factory('smtp', $options);
	if (true === PEAR::isError($mailer)) {
		die ($mailer->getMessage());
	}
	$headers = array(
		'From' => 'me@unibas.ch',
		'To' => $_POST['smsor_to']."@sms.switch.ch",
	);
	$res = $mailer->send($_POST['smsor_to']."@sms.switch.ch",
				$headers,
				$_POST['smsor_message']);

	if (true === PEAR::isError($res)) {
		die ($res->getMessage());
	}
	echo "Message <br>\n<i>".$_POST['smsor_message']."</i><br>\n
		sent to <i>".$_POST['smsor_to']."</i><br>\n";
	echo "<br><hr><br>";
}
?>

Recursively delete files by extension

Recently, I got the task to remove all MP3- files from some shared folders (SMB shares). To do so, I wrote a tiny batch- script wich processes the DIR command’s output and examines it to match the MP3 extension.

Usage:
The script processes all folders and subfolders in its working directory (e.g. if you run it in c:\scripts it processes all folders and subfolders from there on – c:\scripts\*)


@ECHO OFF
FOR /F "tokens=*" %%G IN ('DIR /B /S *.mp3') DO DEL /F "%%G"