Adding KML Tracklogs to a Google Map

I finally got my hands on a GPS Track logger device (Holux M-241, a very nice gadget by the way) and thought to myself, it would be nice, if I could take those KML track log files and just upload them somewhere to make them available to be viewed on a web page. This is what came out as a first lazy sample:

https://looke.ch/kmloverlay/
You can find the source here: https://looke.ch/kmloverlay/source.php

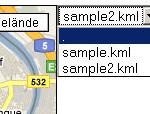
It basically looks for KML files in a folder, which you define and puts them in a select box. Here you can select the file you want to have drawn on the Map. Very basic functionality, but its a start at least. Probably I will continue to add new stuff to it (like a description of the track logs or comments etc.)

The main part of this sample is Googles GGeoXml class, which allows to pass a publicly available KML to the Google Maps API:


map = new GMap2(MapElement);
geoXml = new GGeoXml(KMLurl);
map.addOverlay(geoXml);


UPDATE:
In order to preserve the usability on mobile devices (e.g. Android phones), I added some JS to load a different style for devices with screens that are less than 320px wide:


if (screen.width <= 320) {
document.write('<style type="text/css">div#map{width: 300px; height: 310px;}</style>');
}
else {
document.write('<style type="text/css">div#map{width: 640px; height: 480px;}</style>');
}

A small webchat using JavaScript, PHP and MySQL

During my studies, I had some lectures about Ajax driven web-services in the second or third semester and I thought, that I can build something like that on my own. So I started this little chat project and gave it a try.

Used technologies:
JavaScript (for Ajax action), PHP and MySQL, HTML and CSS
(Thats also where the name comes from – AMPChat – AjaxMysqlPhpChat)

The working mechanism is the following (simplified):
A JavaScript function polls a PHP script, telling it which chatmessages it already knows. The PHP script checks, whether there are new chatmessages stored in the database or not and sends its response – an XML with either no records (if no new messages are around) or one with the missing chatmessages. The JavaScript then writes the new messages in a DIV element of a website.

The chat is available under the following link:
https://looke.ch/amp
user: guest
password: 123123

The whole thing is open-source. You can find the code here: https://looke.ch/amp/source.php

Displaying custom markers with Google Maps

In this example, I try to explain you how to embed custom markers, containing data from an external datasource (in this case a MySQL database) in a Google Maps map, like the example below:

To test my code yourself, you need the following:

  • A Google Maps API key (get one here)
  • A Webserver capable of running PHP and MySQL (for development I recommend XAMPP)
  • Little knowledge of PHP and JavaScript

Lets call the project MapSomeStuff.
The whole thing consists of two files, a JavaScript file, wich contains the most of the calls to the Google Maps API and a PHP file, containing my MapSomeStuff class wich gets data from the database and prepares it to be put on the map.

Technical backgrounds

In a first step, we take the address of our marker- entry and pass it over to the Google Maps API to translate it to latitudinal and longitudinal (lat and lng) coordinates (wich is essential in the next step).

Now the data, wich is later displayed on the map as a marker is being read from the database and formated as XML- output (look out for the lat and lng attributes):

<markers>
<marker name="Basel SBB" street="Centralbahnplatz" nr="1" town="Basel"
 zip="4051" country="Switzerland" description="Railwaystation Basel SBB"
 lat="47.5482662" lng="7.5909349"/>
</markers>

In my example we still have the address in the XML dataset. This is only additional information for the user. In fact, Google Maps only needs the lat and lng attributes to place the marker on the map.

The XML gets sent to the Google Maps API, wich then places the markers on the correct coordinates.

The code

To avoid ruining the site’s look, I link the code. Just downlad the file, rename accordingly and put them all in the same directory:
mapsomestuffphp – containing the PHP class and HTML parts. Rename to mapsomestuff.php
mapsomestuffjs – containing the API calls. Rename to mapsomestuff.js
mapsomestuffsql – containing the database structure and an initial dataset

Dynamically add HTML- elements using Javascript

Ever wanted to dynamically add HTML- form elements to your website? For example, if you want to have the ability to assemble your own list of items?

This script might help you to do so. It is extensible to add other elements as just normal input- fields.

After integrating it to your site, the whole thing might look like this:

You can add new input fields with the [+] button and remove existing inputs with [-]

Currently running flawlessly with Mozilla Firefox. Internet Explorer causes problems.


<html>
<head>
<title>JS HTML Element adder (w. OOP)</title>
<script language='JavaScript' type='text/javascript'>

function FormInput(name) {
	this.name = name;
	// window[name] = this;
	this.FormInput = new Array(0);
	this.FormInputValue = new Array(0);

	document.write("<p id='" + this.name + "'></p>")
	document.write("<a href='javascript:" + this.name + ".addFormInput()'>[+]
		</a>&nbsp;<a href='javascript:" + this.name + ".removeFormInput()'>
		[-]</a>");

	this.addFormInput=function() {
		this.FormInput.push(this.FormInput.length);
		this.FormInputValue.push("");
		this.createFormInput();
	}

	this.createFormInput=function() {
		document.getElementById(this.name).innerHTML="";
		for (i=0; i<this.FormInput.length; i++) {
			document.getElementById(this.name).innerHTML+=
			this.displayFormInput(this.FormInput[i],
			this.FormInputValue[i]);
		}
	}

	this.saveFormInputValue=function(id, value) {
		this.FormInputValue[id]=value;
	}

	this.displayFormInput=function(id, value) {
		return this.name + id + "&nbsp;
		<input type='text' " + this.name + "='" + id + "'
		onchange='javascript:" + this.name + ".saveFormInputValue(
		" + id + ", this.value)' value='" + value + "'><br>";
	}

	this.removeFormInput=function() {
		if (this.FormInput.length > 0) {
			this.FormInput.pop();
			this.FormInputValue.pop();
		}
		this.createFormInput();
	}
}

</script>
</head>
<body>
<form name="test">
<script language='JavaScript' type='text/javascript'>

testing = new FormInput('testing');
testing2 = new FormInput('testing2');

</script>
</form>
</body>
</html>